Bearded Iris Growing Planting Tips
Bearded Iris Plants Planting Growing & Caring Instructions
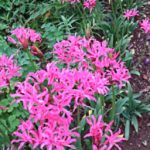
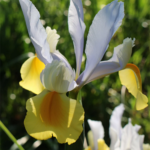
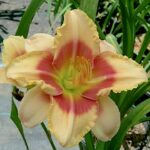
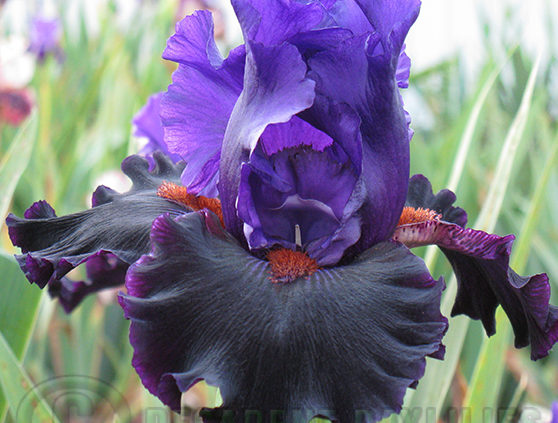
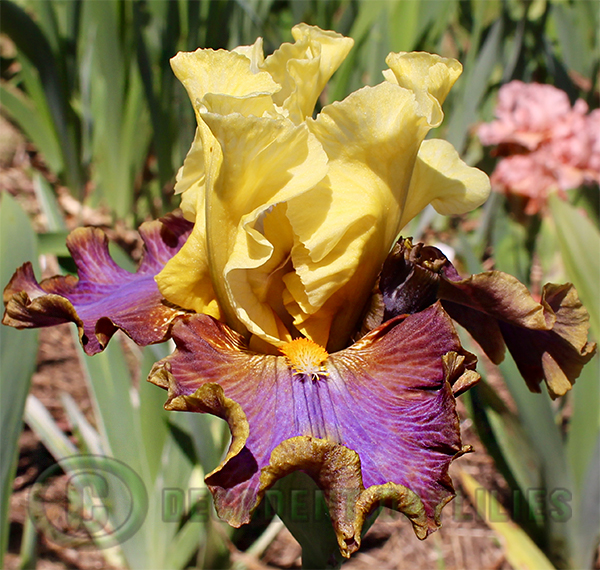
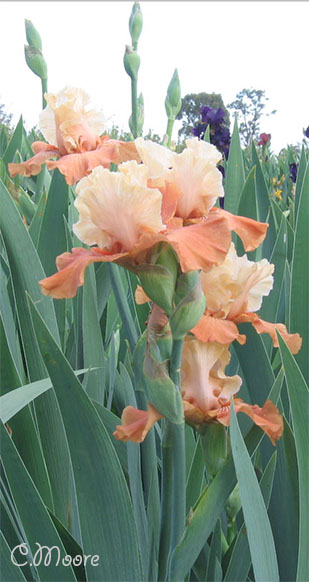
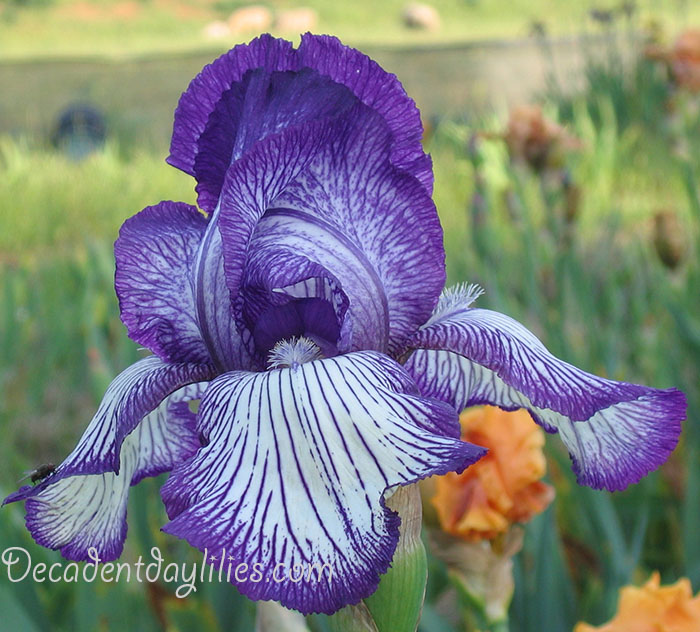 Bearded Iris (Iris Germanica) In my climate, bearded iris are semi evergreen flowering perennials. Tall bearded Iris have showy flowers, grown from rhizomes that can flower each spring. They require minimum care and multiply easily producing extra rhizomes to go on flowering the following season. The species have few more or less than 10 sword shaped flat leaves that grows to resemble a fan. The leaves are bluey green in colour about a foot in height and an inch and a half wide that grows in time to form a clump. The Iris fans are sometimes tinted burgundy at the base of the leaves usually on very rich deep red varieties and this sometimes happens on white Irises as well. The flowering stems are long, erect sometimes with a twist or curve in the stem but should be well branched especially if they are registered named varieties. The Iris flowers have 6 petals all together, with 3 outer petals which are large called falls, they can be gracefully flared or ruffled and falling. The 3 upright erect inner petals are called standards. The roots of the bearded iris are fleshy and the feeder roots grow close to the soil surface.
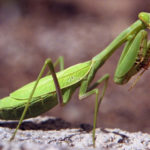
Bearded Irises have thick bushy or caterpillar like beards, that have many short raised hairs that assist in pollination. The insects will reach into the flower for it’s reward brushing pollen grains from the anthers, the pollen grains also stick to the insects body, pollen will then come off on to the stigma while the insect is visiting the next flower and not knowing the pollinator accidentally pollinates the flower.
This plant is a native to southern and central Europe. The genus Iris belongs to family Iridaceae and has more than 300 species. You can make a careful selection of a variety of colours but bearded Iris do not come in bright red.
The History of Bearded Iris
History of the Iris is rich and it dates back to the period of the ancient Greeks. Iris in Greek represents “Rainbow”. The plant is named after the Greek Goddess of the messenger of love. It is believed that this goddess used the rainbow to travel. Irises are also depicted on the walls of Egyptian palaces. It is believed that the Moslems took the Iris plant to Spain during the 8th century and used them to plant on the graves of women to beckon the goddess to guide the deceased on their eternal journey. During the middle age, Fleur-de-lis became the accepted national symbol of France. For the Egyptians, the flower symbolised the essence of life as well as a renewal of life. A flower present on the famous Sphinx is an Iris and another one appears on a bas-relief from the time of the 18th Egyptian dynasty. The three large petals were thought to represent faith, valour and wisdom. With the European settlers, the Irises reached the new world. According to early records, Irises were found in Virginia in 1600. The rhizomes of the plant were used for medical purposes and flowers were used for manufacturing perfumes.
Depending on the colour of the flowers and the region in which it is used Irises have different meanings when gifted to a person. In some regions of the world purple or blue Irises denote royalty and yellow is considered as a symbol of passion. Today Irises are cultivated in Europe, Middle East, Asia, Africa, North America, Asia, Australia, Northern Africa, etc.
Where Do Bearded Iris Grow In Australia
Bearded Iris grows best in Victoria, South Australia, Tasmania, southern Western Australia and will also grow in inland areas of Queensland and New South Wales and Northern Territory. Bearded Iris will not grow in Queensland, NSW coastal areas and north of Sydney.
Types of Bearded Iris
There are many original species as well as hybrids of the plant available. Based on the flowering height these plants are classified into three major types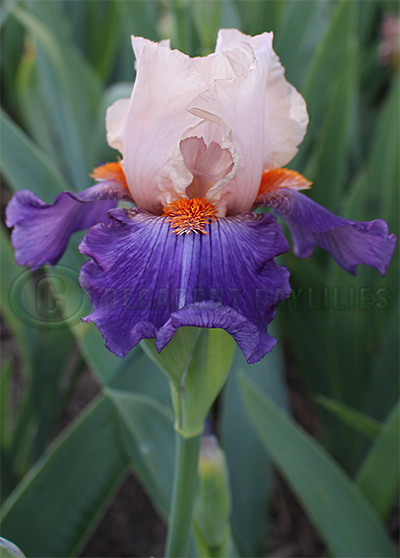
- Dwarf Bearded Iris- Iris, which is under 16 inches come under this division. They are again divided as Miniature Dwarf Bearded which is under 8 inches and Standard Dwarf Bearded which are 8-16 inches tall. They have 2 or more terminal buds.
- Median Bearded Iris- Iris, which is between 16-27 inches come under this category. They are further divided to border Bearded, intermediate Irises and aril bred Irises depending on the growing conditions required by them. They are also known as bouquet Irises or table Irises.
- Tall Bearded Iris – This Iris grows over 27 inches and bears 2 or more branches and at least 7 blossoms. These Irises bloom later than other smaller varieties.
Growing Conditions of Bearded Iris
Bearded Irises are easy to grow, you will be able to enjoy a wide range of flower colours at flowering season that extends for 2 months of the year, when you grow them in perfect conditions as needed by the species.
Where to Plant Bearded Irises
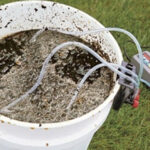
Bearded Iris requires 6-8 hours of good sun and well drained loamy soil. You can rejuvenate the hard soil in advance, ready for growing bearded Iris by adding lots of old organic matter well under the rhizome at planting time, this will improve the soil quality and drainage. The preferred soil pH is slightly below seven. Bearded Iris especially dwarf bearded iris require a period of vernalisation, known as exposure to prolonged cold winters, many nights of under 5 C to produce quality flower stalks.
Bearded iris need enough water and fertiliser during their growing season to achieve new flowering size rhizomes by summer. Water isn’t as important in the summer because the rhizomes should be fully developed and ready to flower. Rhizome rot is a result of poor drainage.
How to Grow Tall Bearded Irises – Tall Bearded Iris Planting Instructions
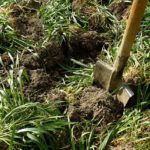
Prepare the garden bed by loosening the soil using a tiller, garden fork or shovel. The depth of the garden bed should be at least 12-15 inches. If you want to plant bearded irises dig holes of 12 inch diameter and 12 inches deep in the soil.
How Do I Plant Bearded Iris Rhizomes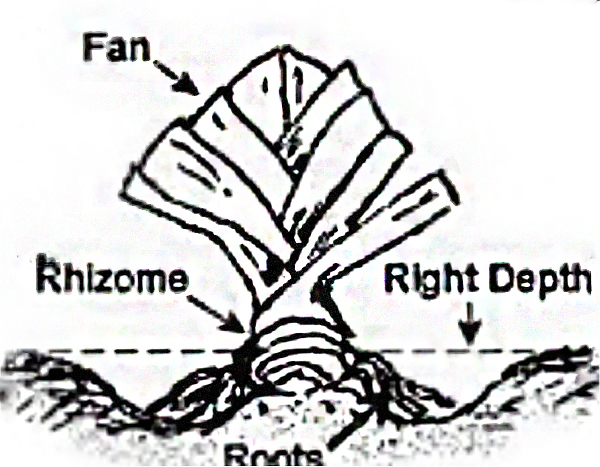
- Dig a small hole to plant bearded Iris rhizome
- Add fertiliser or compost in the bottom of the hole 5 cm under the rhizome
- Form a shallow mound of soil over the fertiliser within the planting hole
- Place the rhizome on top of the mound so that the leaf fan is straight
- Spread the roots over the mound this keeps the rhizome in place
- Press the rhizome down on the mound so it makes good contact with the soil
- Barely cover the roots and the rhizome over with 1 to 2 cm of soil to prevent sun scold
Make sure that your Irises are planted at least 6 weeks before the frosty winter season. After planting bearded Iris thoroughly water the rhizomes. Divide and replant the Iris when the clumps are too congested and size and number of flowers have declined.
- When to Plant Bearded Iris Rhizomes In Australia – Iris planting is best done six to eight weeks after flowering that is November to December in Australia or wait till the cooler months when the weather starts to cool down from mid way through March till towards the end of March when the Iris are fully developed and are semi dormant. This is the best time to plant irises after the summer heat subsides in order for them to take root to flower in the following spring. After this, the bearded Iris go dormant for the winter and the bearded iris stop growing.
- How Deep to Plant Bearded Iris Rhizomes – Plant bearded Iris rhizomes just below the soil surface, cover the rhizomes with 1 or 2 cm of soil. Do not leave the rhizomes exposed too much Australia’s hot sun otherwise, the rhizomes can scald.
- Spacing Distance Apart – Plant Bearded Iris 40 cm (16 in.) apart, Medium and Dwarf Bearded Iris can be planted 30cm (12 in.) apart.
When the flowers of the Iris plant start to fade, care should be given when you cut off the flower stalks from the base of the plant.
Bearded Iris Water Requirements
Once established the bearded Iris plants require very little water. Deep watering at long intervals is the preferred method of care. Avoid over watering the plants.
- It is necessary to water the plants throughout the summer no more than once a week.
Garden Care and Care of Iris Rhizomes to Prevent Diseases
- Pull away the dead leaves after flowering and keep good Iris care by keeping the irises neat and tidy.
- Do not plant Irises in shady parts of the garden.
- Do not cut down the foliage other than replanting, the foliage is needed to produce flowers for the following season by cutting the foliage this is more likely to reduce next seasons flowers by 15%.
- Every 2-3 years, your bearded Iris clumps will need to be lifted and divided.
It is important to keep the base where the rhizomes are clean and tidy. Remove any dead brown dying, diseased looking leaves often, to prevent snails, fungal spores, slugs around the plant. Snap off the old spent flower stems (they snap off easily) at the base of the rhizome. Do not cut the foliage back anytime while irises are not moved.
Fertilising Bearded Iris – What do I feed My Bearded Iris
To feed, fertilise with low–nitrogen fertilisers that has a good amount of potassium and phosphorous are the best and safe fertilisers to feed your Iris plants. Rose and Tomato fertiliser are very suitable for bearded Iris. The ideal time to feed them is during early spring. You can also feed a second dose straight after the irises have finished flowering. Avoid fertilisers that are high in nitrogen there is a good chance they will cause rhizome rot
Diseases and Pests of Bearded Iris
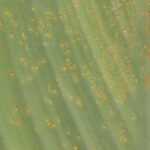
The common diseases that can affect Iris are fungal leaf spot, bacterial leaf blight, crown rot caused by fungi and bacterial soft rot. You can avoid these diseases by keeping the garden bed free from debris and providing good sanitation. Providing good spacing between plants improves air circulation and reduces fungal attacks.
How to Prevent Fungal Leaf Spot on Irises? – If you have leaf spot on your bearded iris it is too late, not much you can do about it. Leaf spot grows more so during foggy, frosty and rainy weather. A protective coating of Mancozeb will stop and prevent the new infections of fungal brown leaf spot. Mancozeb works by putting a protective film on the Iris leaves and this keeps the leaves clean of leaf spot. Mancozeb will NOT kill established leaf spot infections as mancozeb is not systemic so plan ahead. You may prefer to use thiram or zineb they act the same way. Use a sulphur based spray then a copper base spray once or apply a different fungicide brand for extra resistance.
How to Apply Fungicide to Prevent Leaf Spot in Bearded Iris? To prevent fungal leaf spot I only ever coat the leaves three times starting when the bearded iris plants come out of the dormant stage in July / August, repeat with a spray that is not identical. When the leaves are 8 inches tall, spray again and again when the leaves are 12 inches tall normally you only need to do this if you have or are in for a wet spring. A sprinkling of agricultural garden lime during early autumn can also help.
How to Treat Soft Rot in Bearded Iris – If there is any outbreak of soft rot, remove the rotting tissues immediately and drench the rhizome with 10% bleach solution. Allow the affected area to dry out and then replant and cover up with soil.
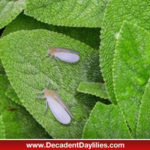
You may see snails and spider mites and you may need to deal with them.
Bloom Habits of Bearded Iris Flowers
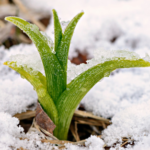
The bearded iris will go dormant in the winter and the leaves are short up to 6 inches tall. As soon as the ground starts to thaw from the cold frosty winters, at the end of July, the bearded iris start to grow their leaves quickly and within no time they are putting up strong flower stems to opening out their magical colours. The different type of Bearded Iris has different blooming time. The dwarf varieties may start to unfurl their buds as early as September and median Bearded Iris will continue the colour spectacle in a few weeks later. This will be followed by flowering of tall Bearded Iris varieties starting to flower in early October. The approximate bloom period for each bearded iris is about two weeks. You can extend the bloom time in your garden by planting some dwarf, medium and tall Irises, early mid and late varieties which will extend the bloom season. Selecting re-blooming varieties will help to have blooms in your garden even in summer and autumn and even winter. Only about 60% to 75% of Bearded Iris bloom in the first year of planting. Blooming can also be affected by bad weather conditions and the frost during late spring. The iris blooms of today are very fragrant and have outstandingly increased their petal width and size.
Bearded Iris produce flowers each year if they get plenty of sun and the rhizomes are flowering size plants planted at the right time of year.
Tall Bearded Iris Reblooming known as rebloomers will repeat flowering and produce 2 flushes of blooms per growing season or year. I have experienced bearded Iris reblooming six weeks after flowering, during autumn and winter.
Iris Rebloom will depend on the cultivar, the size of the rhizomes, the growing conditions, and climate that the bearded iris is grown in there is no guarantee when a bearded iris will rebloom.
Dead heading Bearded Iris
Once the Bearded Iris plant finishes blooming, the spent flower, as well as the flower stalk, has to be removed. Once the bearded iris flower dies, cut the bloom just below the flower. It is better to remove the stalk when it turns brown. You need to remove any brown coloured leaves as well by tugging the leaf and it should come away from the plant easily.
Dividing and Transplanting Bearded Iris
The rhizome/tubers are a thick horizontal structure from which leaves, roots and flower stems develop in Bearded Iris. When the plant gets established, each rhizome produces at least 2 or more back bulbs and rhizomes each season. This will, in turn, cause the development of more flowers and leaves. As a bearded iris rhizome will only flower once in a life time and that part of the rhizome will die. In the meantime, the Iris clump will become congested after a period of three years, and you will be left with a dead clump of rhizomes in the centre of the live rhizomes, which are circled on the outside of the dead clump. Bearded Iris takes a lot of goodness out of the soil, especially after three years. So much that the garden soil will need a spell and definitely will need the soil potency revamped. You’ll need to remove and replant the healthy rhizomes and revitalise the soil with fresh new ground and this will grow a fresh healthy new clump of Irises.
- Irises are not picky but the best time to divide and replant Irises is late summer or soon after flowering Why? You can dig out the clumps using a garden fork. By using a garden fork it is near impossible to chop the rhizomes and easy to dig up as the feeder roots and rhizomes are shallow.
- Using your hands pull apart the rhizomes to divide them. If you need to use a knife to cut off baby rhizomes, you should dip the knife in 10% bleach solution before making cuts.
- Select only the rhizomes that have buds and roots to replant and discard the old dead rhizomes.
- Clip the leaf blades to a length of 4-6 inches and replant the divided rhizome by just covering the rhizome with soil. Make sure when you plant the rhizome that the roots are spread out in the soil and the rhizome is planted nice and straight – up and down otherwise you will have crooked flowers come flowering time.
- Space the Iris plants at a distance of 12-18 inches. Dwarf varieties can be planted closer and taller varieties should be placed farther from each other. Water well after planting.
- If you have already got lots of rhizomes of the one variety the way to replant them is clumps of 3 to 5 good rhizomes in a tight circle with the fan of the rhizome leaves facing outwards and this will give you an instant clump the first flowering season.
How to Grow Bearded Iris in Pots
Growing Bearded Irises in pots can be successfully done like this. You will need to use 6-8 inches wide pots for dwarf varieties and 12-inch pot for tall Bearded varieties. Ensure perfect drainage and add potting soil, which contains 45% fir bark, 35 % peat moss and 20% pumice. Leave a space of one inch down from the rim of the pot when filling up with potting manure at the base of the pot then finished with potting soil at the top, leaving the rhizome exposed to heat and frost. It is very important that the top half of the rhizome is exposed to sunlight while planting bearded Iris in pots this will prevent Iris rot. Water only when the top 3 inches of the soil becomes dry. During winter, keep the pots outdoors out in the open where they can get plenty of cold frosty weather on them and some morning due, this will result in the best flowers later on. If the pot gets too congested you can divide the Iris in pots after they bloom.
Vintage Bearded Iris
Though many hybrid and modern Irises have been developed there is still a demand for old natural varieties from gardeners. The vintage Irises are considered to be more graceful than the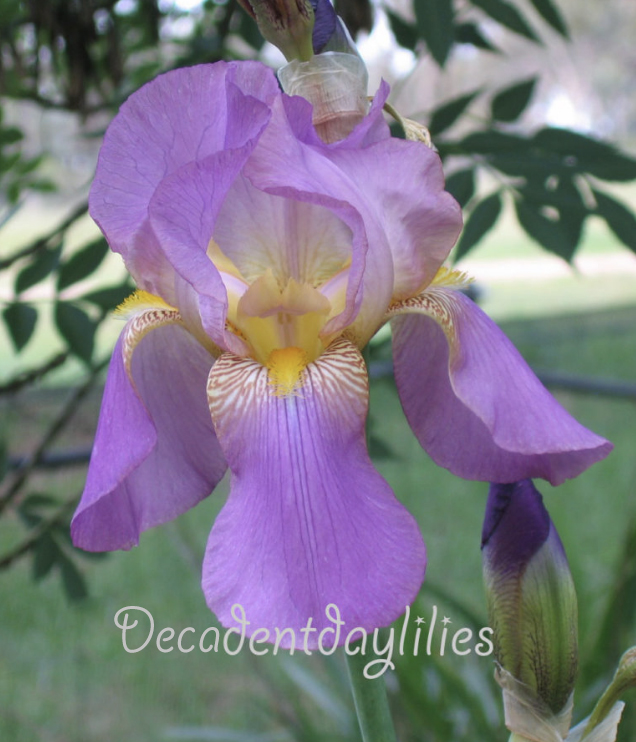 modern varieties. Some of the historic varieties include
- Alaskan Sunset- This is a tall Bearded variety with orange fall colour.
- Dalmatica- This variety was identified in 1600, which bears lilac purple flowers.
- Dauntless- This species with red self and darker falls of velvety quality has been identified in 1929
- Indian Chief- Identified in 1929 with a reddish tinge on yellow standards and deep red coloured falls, I still have this one growing in my garden today and the two below.
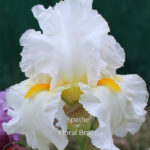
- Albicans- This fragrant species were collected in 1860 from Arabia. Iris Germanica a white bearded iris, comes with yellow flush around the fuzzy beards, known as the vintage white flag iris.
- Germanica – This is the authentic Purple Bearded Iris, the German Iris, old fashion purple flag iris which is the state flower of Tennessee.
Uses of Bearded Iris in the Garden
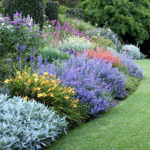
- Bearded Iris can be used in the garden for various purposes. The smaller varieties can be used as borders in the garden or in rockeries or as perennial beds. The medium and tall varieties are more suited as foundation plants around the house or for landscape borders.
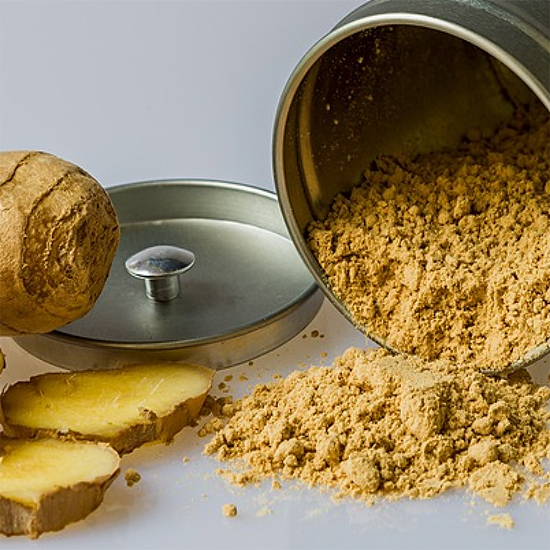
- Apart from garden use, Iris is also used in medicines and in the production of aromatic oils. Rhizomes of German Iris or I. Germanica and Sweet Iris or I. Pallida are used in perfumes and medicines. The essential oil taken from Iris flowers is used in aromatherapy. Did you know the juice of the Iris is used for treating skin diseases and for removal of freckles?
How to Mulch Bearded Iris
There is nothing stopping you from mulching bearded Iris it is knowing where to put the mulch. You can mulch around the back of the rhizomes, but do not cover the top of the rhizomes. The mulch rots into the ground and helps to make fantastic soil and helps keep the weeds down. Fine grass clippings added sparingly every few weeks make good mulch for Iris. You can manoeuvre the clippings around the plant easily.
Other types of iris bulbs and rhizomes to look out for are Dutch Iris, Siberian Iris, Japanese Iris, & Louisiana Iris or the Water Irises that you can grow in your garden.