Growing Daylilies from Seed Pods
Growing Daylilies from Seed Pods
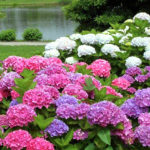
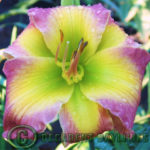
Starting daylily seeds is an affordable way to make a beautiful garden filled with unique daylilies. You will be anxious to see how your garden turns out when the daylily seedlings approach flowering stage, since you will be waiting to see what the daylily seeds will produce. There will be different types of daylilies that were hybridised and sold to you as seed, so your garden will fully depend on the types of daylilies seeds you will buy or have cross pollinated yourself, but please don’t expect all the daylilies to be the perfect colour the perfect shape or the perfect size because most of the daylily seedlings won’t be, but anything is possible, I can tell you that you will always remember your first daylily seedling that flowers and it may not look anything like its offspring consequently I am sure when you see your first time raised daylilies from seed, there will be a few daylilies you will keep and some that you will discard and class them as dogs.
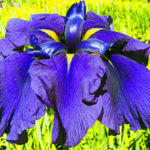
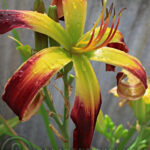
Pictured is one of last years seedlings which has one of the qualities I am looking for being exceptionally vigorous compared to all the other seedlings it will be interesting to see what the rest of the seeding displays.
When to Plant Daylily Seeds
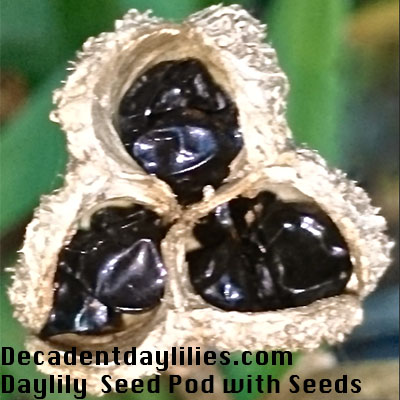
 When you have purchased the black daylily seeds which are normally packed 5 per pack from your daylily seed supplier, the first thing you will need to do is chill the seeds for at least 2 to 3 weeks this is called the cold stratification process of seeds some daylily seeds do not need stratifying but unless you have experience with germinating daylily seeds it is best that you chill all daylily seeds for at least three weeks moreover you can leave the seeds in the refrigerator for a long time this keeps the seeds fresh until you are ready to plant them but make sure you do not freeze them or they will not break dormancy to further produce seedlings. You can plant daylily seeds any time of the year if you choose the wintertime you will have to use bottom heat and start your seeds covered and kept in a shade house.
Growing Daylily Seeds
Growing daylily seeds is easy and here are several ways that you can do this first of all, after the daylily seeds have been harvested many people germinate daylily seeds by soaking the seeds in water for 1 to 2 days before the planned day of planting, to prevent the daylily seed from rotting you can add one teaspoon of 3% hydrogen peroxide to every cup of water. As soon as the seed swells and sprouts plant the seeds. Another germination process is to lay out some wet paper towel 5 thickness thick and lay your seeds on this with only standing room, do not over crowd the seeds then add more wet paper towel on the top of the seeds and put the seeds into a securely tied dark plastic bag to be kept in a cool dark place. When the daylily seeds start germinating plant them into the seed raising mix. The third way is to put the daylily seeds randomly into some damp sphagnum moss, in a zip top bag kept in the dark, keep a check on the seeds as the seeds start to sprout within days then plant the daylily seed, this is my preferred germinating method.
Now that I plant many daylily seeds per year I plant them straight into a pot with seed raising mix as every seed is precious.
Never plant daylily seeds straight into the ground because mice eat them and birds scatter them and anything such as snails and slugs will eat the seedlings once they are showing green leaves. Be a professional and plant your daylily seeds in pots otherwise you could end up with none.
How to Plant Daylily Seeds
Plant the daylily seeds as soon as you see the white tail form from the daylily seed, this is a sign that the daylily seed has germinated the seed can be planted in ¼ inch deep in a small pot using a seedling or seed raising mix, use a pen or pencil to make a small hole in the soil and plant the sprouted seed and back fill. Some flower growers plant the seeds when a few seeds have started germinating while others wait till each seed has germinated but whatever you decide, be sure to keep the soil moist and not waterlogged aside from this the soil should only be watered from the bottom. There is always a possibility of the seed rotting at this stage nevertheless you can use your preferred fungicide or a very diluted hydrogen peroxide solution watered down with 1 teaspoon of H2O2 to a cup of water this will help prevent damping off from happening, in other words, stop the daylily seeds from rotting. At this stage, the pots should be kept out of the direct hot sun but you have to be sure that the seedlings are receiving filtered sunlight at least.
Fertilising Daylily Seedlings
Use liquid fertiliser on the seedlings when they reach about 2 to 3 inches in height. The fertiliser should be used at half the normal strength and should be applied at least weekly while in their pots.
Daylily Seedlings
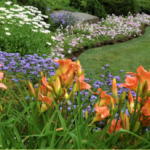
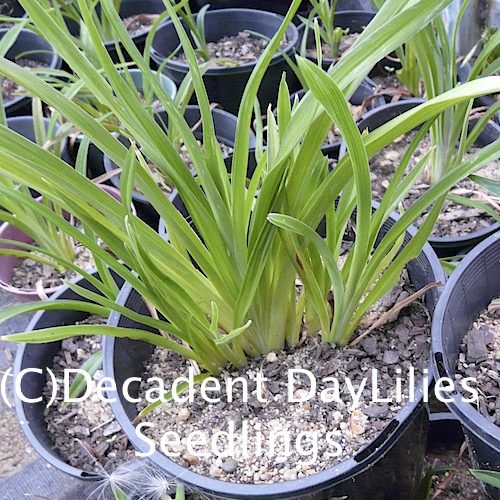 It is best to start introducing the daylily seedlings to direct sunlight slowly one week at a time. You should start by introducing them to a few hours of sunlight then more and more each day until such time that they eventually receive 6 hours of sunlight, daylilies need at least 6 hours of sunlight each day to effectively flower. When the daylilies reach the height of 10 inches they can be transplant into the garden beds or repotted into larger pots. If the seedlings are planted outside in the garden the soil should be at least 15 C and the season should be past frost time. This will ensure that the plants are not affected by frost and will surely provide the daylily seedlings with a good start. Remember to mulch heavily on your transferred plants and water them every other time with a week solution of seasol or a half strength soluble fertiliser until they are established. Out of all your planted daylilies, it is expected that 50 percent of the seeds will fully mature. It normally takes about 2 to 3 years before the first time daylilies flowers start to bloom, if you experience the four seasons in Australia. If you live in tropical areas of Australia you will more than likely to get your seeds to flower within 18 months. In this situation, it is possible that the daylily seedlings can undergo flowering in the first year but the true, full beauty of the flowers will not be seen until the third year when your seedlings are more mature.
Selecting the Best Daylily Seedlings
If you are keeping the best daylily seedlings you need to look for most hardy and vigorous plant this daylily plant needs to have good substance, good branching it is best if the daylily is fertile besides this it would be extra good if the plant had good neat plant habits and a big bud count nowadays hybridisers are looking for disease resistant daylily plants as well.
The key is to be patient moreover you will start seeing a beautiful flower garden in no time by following the above methods and techniques of growing and germinating daylilies from seed.