20 Tips for Growing Beautiful Daylilies
20 Tips for Growing Beautiful Daylilies
1. Good daylily gardening starts with the best soil. If the garden soil is not healthy for your daylilies you will not grow beautiful daylilies. Here is how to improve your garden soil and make the soil drain better otherwise your daylilies will be stunted and the flowers will be smaller than their registered size.
 Clay soils are sticky and are identified by rolling the soil in a ball in your hand. Clay soils are hard in summer and restrict the daylily roots to push deep into the soil. Applying river sand and gypsum to the clay soil in advance dig it in. This will take a couple of months to fix the problem.
- Sandy or beach soils alone are poor soils and needs to be amended with well rotted manures, compost and a clay based soil.
2. Where to plant daylilies in the garden? If your summer weather temperatures are up to 32C and below then you can grow your daylilies in full sun every day. If you live in a hot climate above 32 C then you need to provide your plants with morning sun to midday and afternoon shade for the rest of the day to save the leaves and flowers from being scorched.
3. This is how to plant daylilies in the garden. The proper depth is to cover the roots and crown with 5 cm of soil more than this your daylilies may not bloom and may even rot.
4. Having the right pH is very important, the pH needs to be slightly acidic soil 6.5 to 7 only then the daylily plant can take up the right nutrients for best growth. It is not necessary to use lime unless your soil has a pH of less than 6.0.
5. When to plant daylilies? The right time of year to plant daylilies is in the cooler months from autumn around to spring, avoid summer it is too stressful on the plant especially when they are supplied from nurseries and planted with bare roots.
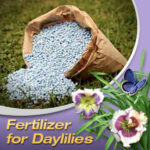
6. Feeding daylilies, it is best not to fertilise your daylilies when they are first planted. Feed them with an all purpose fertiliser once they have renewed the whole fan of leaves after planting. Established daylilies can be top dressed with a do-it-yourself compost or fertilised after the frosts have finished early October before flowering each year.
7. Spacing between daylily plants needs to be at least 60 cm apart for standard or extra large daylilies, 45 cm for small daylilies and 30 cm for dwarf and miniatures so that the varieties are kept separate and they do not grow in together.
8. Mulch daylilies keep the mulch away from the stems when daylilies are newly planted in the ground. By covering the ground with organic mulch will help to reduce heat on the roots, conserve water and reduce weeds on new and established plants.
9. Divide daylilies anytime during the refreshing months of the year from autumn to spring. Never divide during the summer months when and after the daylilies are in full bloom this is when the daylilies are semi dormant.
10. For maximum impact choose daylilies that bloom early, late and mid season, this will give your garden the longest serving display of daylily flowers.
11. Water daylilies by keeping the soil damp at least during the spring time this will encourage reblooming in the autumn. Otherwise water twice a week during hot summers.
12. Deadhead your daylilies for a fresh look if you are not hybridising. By removing the day old flowers when the flowers fade this will give your daylilies a well kept look.
13. Daylilies grow much better in the ground where they can have a free root run. To get the best daylilies grown in pots and containers the soil needs to have a good balance of peat, sand and homemade compost, a quality potting soil that is free draining.
14. Divide daylilies before the daylily plant gets too choked up and stops flowering. Do this during the cool months of the year. Overcrowded or over grown daylilies certainly isn’t a good look so make it a chore to separate and transplant daylilies every 3 years.
15. Dark red and near black blooms planted in filtered light or part shade from afternoon sun will keep the darkest flowers looking fresh.
16. Pests, if you keep your daylilies watered this will stop thrips and spider mites in prolific numbers. Do not grow plants that encourage snails and slugs near your daylilies eg) planting agapanthus near daylilies is a potential hiding place and vegetables, delphiniums, hostas and marigolds with your daylilies as these plants encourages snails and slugs to your garden. It is best to plant Lavender, rosemary, wormwood or tansy these plants will keep slugs and snails away.
17. Companion planting with daylilies, roses make good companion plants, I also grow tall salvias and canna lilies in my daylily garden these plants help shade the daylilies from our hot afternoon sun.
18. If you are hybridising, the best time to pollinate your flowers is early in the morning around 10 to 11 am while the pollen is fluffy and not dry.
19. Clean away and tidy around daylily plants often by pulling away old leaves and scapes after they are brown, this way the scapes will come away free from the plant easily. Cleaning up dead foliage during the year and after the plants have rebloomed in late autumn especially.
20. Watch out for daylily rust, the common time is in spring and autumn when the temperatures are mild. Daylily rust spores appear on daylily leaves as rusty spots and will grow and germinate at temperatures that reach between 15 C and 30 C along with 100% humidity. Cut back infected plants as close as 5 mm above the crown the white area just above the roots and destroy the leaves or put them into the bin.
If you do all these things above your daylilies will reward you and give you a great bonus and provide you with proliferations at the same time your plant is flowering. Proliferations are small plants growing up the stems that you can also plant in your garden. But if you neglect your daylilies they will not thrive and you will not see the plants hidden features.