Dutch Iris Planting Guide
Dutch Iris Planting and Care How To Grow A Dutch Iris
 The Dutch Iris is one in the most popular plants grown in home gardens and is also liked by florists. These flowers are really pretty and are also easy to grow. The Australian Dutch Iris plants are not suitable to be grown in tropical or sub tropical climate regions. They can tolerate warmer areas but prefers to grow in cool to cold climatic regions. It is an ideal bulb to be planted if you are looking for mass plantings. They are colourful and add an attraction to your home gardens. The Dutch Iris produces light and dark shades of purple, white and yellow flowers, as well as brown rusty shades these days, and all can be grown in sunny gardens.
Overview
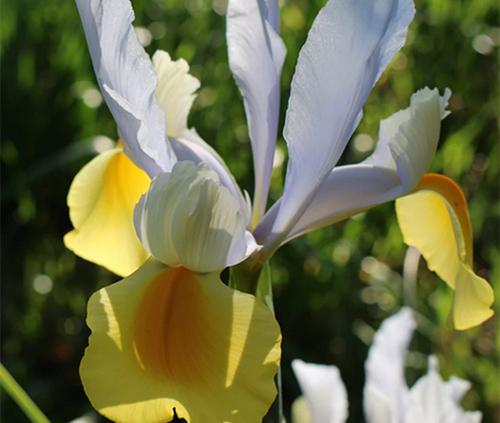
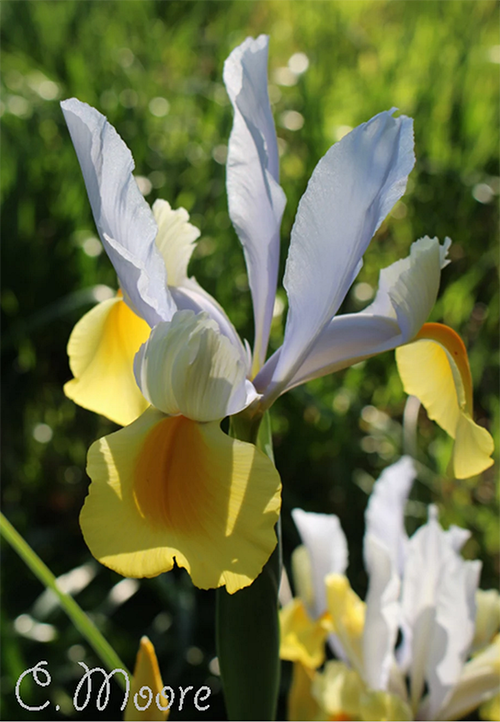
The Dutch Iris is one of the tallest growing spring bulbs. They are an ideal option to grow at the back of garden beds or as borders. With their long straight stems that make them an excellent choice for picking. It is the most preferred spring bulb flower by florists. The Dutch Iris foliage is green, upright and narrow and will perfectly complement the bloom. The flowers come in luxurious purple coloured petals with a touch of gold. It grows to a height of 70 to 90 cm and the width of the flower is 15 cm. The botanical name of Dutch Iris is Iris xiphium and it belongs to the Iris genus.
Growing Dutch Iris
The best time to plant the Iris bulbs is during the late summer and early spring. By doing so, you can see the flowers show up in the later months of spring. The plant thrives well in humus rich soil and the soil also has to be well-drained. They are true bulbs and growing them in gardens is very easy. They need to be watered well during planting.
Planting in outdoor beds
- To grow a Dutch Iris it is best to choose a location where the water drains well. Otherwise, add manure composts to the soil to raise the level of the garden bed and this will improve drainage.
- Dig holes in the soil and plant the Dutch Iris about 4 to 5 inches deep. The bulbs will have pointed ends and this end has to be seen upwards when planting. Give about 3 to 4 inches space between each Iris bulb. Place the bulbs where they can receive full sun.
- Water well after planting the Iris bulbs and this will allow the soil to settle around the bulbs well.
Growing in pots
- Fill the pot with well drained and good quality organic soil.
- Place the pot in areas where the bulbs can get full sun.
- Dig about 4 to 5 inch holes in the pot to place the Dutch Iris bulb in, and each bulb needs to be placed 2 to 3 inches apart. Just like planting the bulbs in the ground with the pointed side of the bulbs has to face upwards when planting.
- Water the soil well after planting.
Caring for the Dutch Iris
- Once the Dutch Iris blooms, you can cut the flowers for arrangement in spring bouquets. Cut the flowers on an angle, this allows for the flower to take up more water, by cutting the stems this will not damage the plant.
- Leave the foliage around after blooming and the leaves will carry out the photosynthesis process to strengthen the bulbs. Remove the foliage once the leaves turn yellow and die.
- Water the plant as needed while growing.
There are many named varieties to buy from bulb suppliers to grow. My favourite dutch iris is Acapulco a striking colour so different to purple sensation, lilac beauty and Apollo. You can leave the Dutch Iris bulbs in the ground year after year providing you don’t water the bulbs too much when they are dormant.